
In this article, I will give you a quick overview of the best tools for textual search in your files on Mac.
1. SeekFast
If you need to search the text of your documents in a folder on your Mac, I recommend SeekFast - a powerful tool that allows you to search for keywords in all documents in a folder. It uses intelligent technology to display the most relevant results first.
SeekFast supports all kinds of commonly used documents: Microsoft Office, PDFs, OpenOffice, LibreOffice, email files, many types of text files, and others.
One of the main advantages of SeekFast over all other search tools is that it can search for combinations of words, no matter where they occur in a sentence.
SeekFast ranks results by relevance, which allows you to instantly see the text you need among hundreds or thousands of results.
With SeekFast, you can immediately see the text of all sentences in which the search words occur, which helps you easily navigate among the results. When you click on the corresponding sentence, SeekFast opens a larger part of the text without you having to open the file.
How to use SeekFast
- Download and install the application.
- Click on the "Browse" button to select the desired folder.

- SeekFast will load the folder’s contents. It might take some time depending on its size.

- Once the folder is loaded, it will be added to the search history. You can access any previously read folder from the dropdown list and it will be loaded instantly.

- Type your search terms and press the "Search" button or hit "Return" key.

- SeekFast will present all the matches wrapped in passages. You can click on each passage to view the whole text.

SeekFast offers a free version allowing you to search in folders with up to 50 files.
Advantages
- Search both file names and file contents.
- You can see all sentences containing your searched words.
- View highlighted results in context without opening them.
- Search for combinations of words, contained in any place in a sentence.
- The search algorithm can order the results by relevance.
- Supports a wide range of different file formats.
- One license can be used on 3 devices and is valid for both Mac and Windows machines.
Disadvantages
- You cannot search more than 50 files at once with the free version.
2. Finder
Finder plays a crucial role in macOS - it is not only a file management tool but also responsible for the overall interaction between you and your Mac. Finder handles the launching of applications and managing the windows, and among other things, it offers various possibilities for textual search.
The application was created in the 1980s, along with the Apple GS/OS operating system, but was completely rewritten in 2001 when the Mac OS X operating system was designed.
In this article, I want to show you the Finder's capabilities for searching text in files, for advanced search, for searching hidden and system files, and more.
How to open and use Finder on Mac
Searching with the Finder is easy, similar to searching in Windows with File Explorer. To search, click on the search field located top-right on Finder or use the shortcut Command+F.
You can change the results' appearance using the button at the top. For example, when the result has many files, it is better to display them as a list or column.

You can sort the results on certain criteria using the "Sort" button. Simply click on the column property and choose sorting criteria.

Advanced search by Finder
Unlike Spotlight, Finder does not support search operators directly in the search query. Instead, you need to open the search box with Command+F, and then click on the "+" button. On the left side, you will see the form from which you can choose the criteria for your search.

You can add multiple conditions using the "Add" button and remove them using the "Remove" button.
You can set a Boolean operator (OR, AND, or NOT) in any conditions by holding the "Option" key and pressing the "…" button that will replace the "+" button on the right side.
Finder also allows you to save your current search results as a Smart Folder for later use. To achieve this, click on the "Save" button and specify the name and the location of the folder. If "Add To Sidebar" is selected, the search folder will be added to your sidebar for quick access.

Search in hidden and system folders
By default, macOS hides system files from the users, as accidentally changing them might cause application errors. However, you may need to access them to change system settings or delete the junk files left by a removed application.
You can quickly show or hide all hidden files with Command+Shift+Period.
To search system or hidden folders with Finder’s search box:
- Open Finder and enter Command+F to bring up the search window (make sure "This Mac" is selected, so you can search in the whole system).

- Click on the Dropdown list on the left and choose "Other."

- Navigate to "System Files" and double-click to add them.

- Open the right Dropdown and choose "are included." You can now search in system files as well.

- Click on the "+" button on the right to add another search option.

- From the Dropdown list on the left choose "Other" again, navigate to the "File visibility" property (could also be named "File invisible") and double-click to add it.

- Select "Visible or Invisible" in the right Dropdown.

Save the search settings in Finder
The following steps will show you how to save these or any other settings for easy access and further use.
- Click on the "Save" button at the right to show the Save dialog.

- Change the default name and location as you wish. Make sure "Add to Sidebar" is checked if you want to access it quickly.
- Click "Save."

If "Add to Sidebar" was checked in the previous step, a file with the given name will appear on the Sidebar on the left. Whenever you want to search in the system or hidden files, open it and type your search words in the search box.

Note that Finder still will not let you search in hidden files beginning with a period (e.g. ".identityService.csv"). You have to search them manually or use third-party software.
Search for deleted files
Any files you remove are stored in the Trash Bin unless the system doesn’t have enough free space at the moment of deletion. To access the Trash folder, simply click on the Trash icon in the Dock.
You can also locate the Trash Bin folder in Finder:
- Click Go -> Go to Folder on the menu bar at the top.

- Paste the path:
~/.Trash
in the dialog and hit "Return" to open the path.

- Once you get to the Bin folder, you can use Finder’s search bar to look for a specific file.
- Drag and drop the item to a folder outside the Trash, or if you want to put it in its original folder, right-click on the file and choose Put Back.

Note that once you delete a file from the Trash, it will be deleted permanently.
If your deleted file is not in the Trash, you can recover it from an earlier disk or cloud backup. If you don’t have one, you might want to read how to create backups with the Time Machine or iCloud and prevent future file loss.
If you don’t have any backups, your last option is to try Data Recovery Software such as Disk Drill.
3. Spotlight
Spotlight is a built-in search engine on macOS.
How to open and use Spotlight on Mac
To access Spotlight, click on the magnifying glass button in the menu bar top-right or hit Command+Space on your keyboard.
Type your search terms and Spotlight will bring up the relevant results.

Narrowing down your search results could be essential when you work with a large number of files. Spotlight allows you to type complex search queries by using search operators, which define various types of file properties (type, date created, title, etc.)
Search by file category - text, picture, movie, music or application
You can use Spotlight to look for a specific file category (picture, movie, text, music) using the keyword "kind" followed by a colon and the desired file type. Let us look at some examples:
kind:app – displays only applications.
You can type your search term and then specify the type of files in which to search for it:
utility kind:app – displays all applications that have the word "utility" in their title or description.

Similarly, you can narrow down your results to contacts, folder names, emails, videos, images, or presentations by using their respective keywords:
projects kind:folder – displays all folders containing the word "project" in the file name.

brave kind:movie – displays all videos that have the word "brave" in the file name.

Search by file extension
You can also use the "kind" operator to look for files with a specific extension (.csv, .docx, .pdf, etc.). Note that Spotlight might want you to use the full extension name for some of them (for example, "OpenDocument" instead of "odt"). Examples:
kind:docx – displays all files with .docx extension.
kind: OpenDocument – displays all files with .odt extension.
spinner kind:gif – displays all gif files containing the word "spinner" in the file name.

Search by date
There are several other useful operators provided by Spotlight that might come in handy:
modified:date – displays all files modified on the given date.
created:date – displays all files created on the given date.
Both operators require a date parameter that by default has to be written in the format "month/day/year." If you use a different date format and want to change it, go to System Preferences -> Language & Region -> Advanced -> Dates.
You can modify or create your custom date formats. For example:
essay created:7/17/2022 – show files created on 17th of June 2022 that contain the word "essay."
If you don’t want to specify a day or month, you can just type a year:
project modified:2021 – displays files containing the word "project" that were modified in 2021.
Additionally, you can search for files created or modified before or after a given date by putting the <, =, or > symbols (or combinations of them) before the date.
created:<7/17/2020 – displays files created before this date.
created:>=7/17/2020 – displays files created on or after this date.
sunset kind:image created:>07/15/2021 – displays images created after the 15th of July that contain the word "sunset."
Search by author or publisher name
To search by author or publisher with Spotlight, use:
author:[name]
or
by:[name].
Both operators will display files created by the given author.
You can combine search operators to narrow down your results even further:
kind:pdf by:Adam – displays all .pdf files written by Adam.
kind:music by:Brahms – displays music files created by Brahms.
Other search operators
Spotlight supports many other search operators that might be relevant in different scenarios. To find them:
- Right-click on any file.
- Click on "Get Info."

- In the General and More Info tabs, you will see the properties you can use in your search queries.

Note that different file types might have their own specific properties (i.e. "duration" for music files).
Combine search conditions
Boolean operators are used to combine two or more search conditions. They can also be used together with any other operators or search words.
1. OR – used between two and more operators or keywords. Spotlight will return results that satisfy either of the conditions. If you don’t use OR between different operators, you will get only the results that match all the conditions.
Here are some examples of using the OR operator:
sun kind:image OR kind:video – returns pictures or videos that contain the word "sun."
title:certificate OR title:contract OR title:report – gets all files that contain any of these keywords in their tiles.

2. NOT – used before a keyword or operator to exclude results that match the condition.
loading kind:image NOT kind:gif – displays images that contain the word "loading" except .gif files.
modified>2012 modified:<2020 NOT modified:2015 – displays files modified between 2012 and 2020, but excludes those modified in 2015.
There is also a short version of the "NOT" operator - the dash character. It should be joined with the keyword or condition without space.
brain -research kind:pdf – returns .pdf files that contain the word "brain" but not "research."

network -kind:image – returns non-image files that contain the word "network."
4. Path Finder - an advanced alternative to Finder
Path Finder is a file manager that has a similar interface to Finder but offers much better control over your file system, allowing for more precise and easier searches with its dual panels, folder navigation, advanced sorting and filtering, hidden file manipulation, and much more.
You can access any folder in the hierarchy by clicking on it in the path navigator:

Similar to Apple’s Finder, Path Finder has a Search Bar, from which you can search for a file by typing your keywords.

Click on the magnifying glass to bring up a window that will show your latest keywords and some search options.

Click on the "Dual Browser" button if you want to show a second window. That way you will be able to access two different directories or make two searches simultaneously.

Advantages
- Interface featuring dual pane view.
- Path navigator.
- Customizable commands.
- Batch operations.
- Temporary drag and drop stack.
Disadvantages
- Paid monthly subscription.
5. Marta
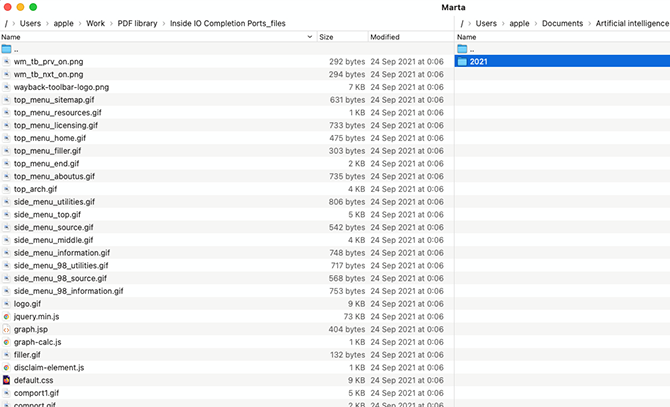
Marta is a free alternative to Finder and offers some common utilities that improve the overall searching experience: dual panel split view, folder navigator, and integrated Spotlight search. Marta’s biggest advantage is that its appearance is fully customizable through a configuration file.
Although Marta lacks the usual interface for configuring preferences, you can find a simple and detailed guide for it in the official documentation.
You can download Marta or just use the command:
brew install --cask marta
in Terminal if you already have Homebrew.
Advantages
- Fully customizable interface.
- Dual panel split view.
- Folder navigator.
- Completely free.
Disadvantages
- Lacks interface for configuring preferences.
6. Search by Terminal
You can search your files using Terminal commands as well. It is not as user-friendly as Spotlight or Finder but allows you to make detailed searches across your whole system, including the hidden files.
Search text in files with the "Mdfind" operator
There are several commands you can use to search in your system. The fastest and easiest one is "mdfind" - a command-line interface for Spotlight. Here is how to use it:
- Open a new Terminal window from Applications –> Utilities.
- Type "mdfind" followed by a space and your search term. For example:
mdfind manual
- Press "Return."
Terminal will display a list of files with their full directories that contain the search term.
Advanced search with the "Find" operator
Another useful command is "find," which can perform a deeper search and can accept more parameters (search directory, file type, etc.). Its Linux counterpart is very similar, so if you already have experience with it, you can operate it in the same way.
Note that the "find" command requires root access, so the steps to use it are:
- Open Terminal and switch to your root user account by entering
sudo su -
- Press "Return."
- Enter your device password.
- Use the "find" command with the following syntax:
find directory_name -name file_name
Replace directory_name and file_name with the respective values you need.
For example:
find /Users -name fish – searches across all of your files in the "User" directory that contain the word "fish" and if there are any, display their full path locations.
You can ignore any entries containing warnings, such as "Operation not permitted" or "Not a directory."
To exit from your root account, just press Command+D.
Search in system files with the "Locate" operator
The "locate" command is very useful for developers. It searches in all system files and ignores user directories.
Here is how to use it:
- Open Terminal and write the following command:
sudo launchctl load -w /System/Library/LaunchDaemons/com.apple.locate.plist – this generates a database with system files, which will take some time, but after that it will be updated automatically.
- Type "locate" with a file name parameter:
locate file_name
Finally, if you want more advanced searches, take a look at the "grep" command. It supports numerous properties including regular expressions. It is visibly slower than the GNU grep used on Linux; thus, if you want to use the latter, you will need to install it with Homebrew.
You can read more comprehensive and useful information about using the "grep" operator in our article How to Search Text in Multiple Files in Linux.
7. HoudahSpot
HoudahSpot is yet another good option to search for text in multiple files on macOS. It uses the Spotlight index, but presents the results in an improved user interface to make search easier.
In addition to the regular search, it allows you to combine various criteria. You can use this tool to search text with the following steps:
- Download and install it on your Mac. Launch HoudahSpot.
- Choose the folder to search from the "Locations" section on the left side of the main window.
- Type your desired words in the “Search Any Text” field and click Return.
- In the Info pane, click on the "Text Preview" icon to see the text found.

Advantages
- You can refine your search with multiple filters.
- You can search multiple folders at once.
- It highlights the text you searched for.
- You can set templates for recurring searches.
Disadvantages
- You cannot view all the sentences containing the searched terms at once.
- HoudahSpot is dependent on Spotlight, so you cannot use it if Spotlight indexing is disabled.
- Does not have a free version.
8. DocFetcher
DocFetcher is another application that can search the contents of the most common file types.
Here is how to search text documents using it:
- Download and install DocFetcher.
- Right-click the "Search Scope" field and choose "Create Index From" -> "Folder" to add folders to the search.

- Type your keywords in the Search field and hit "Return."

DocFetcher will show any matching results for each file.

Advantages
- Search file names and file contents.
- Highlighted results.
- You can use various filters such as by file format, document size, and location.
- Completely free.
Disadvantages
- The interface is not very intuitive.
- It is dependent on Java Runtime Environment (JRE), so you will need to have it installed.
- You will have to click on each file name to see the text.
- You cannot search for combinations of words.
9. Conclusion
I hope this guide was comprehensive and useful enough for you.
Now I would like to hear your opinion – which search software for Mac does the best job for you? Would you like to add something or have a question?
Please share your opinion in the comments section below.
Very helpful information but unfortunately it did not cover the particular problem I was trying to solve. Nevertheless the assistance I received was most helpful.
Hi Rob, could you share the problem you are trying to solve?
Very helpful article. I use the SeekFast tool and I like it. You have described all types of searching on Mac OS. I use some of them.
Thank you for this very useful overview! Is there a solution, using the Finder, for displaying the full path of each individual files returned in the search results ? Basically I would like to see an extra column giving the full path to the file. Then I can see in one view in which directories the found files are located.
Hi, thanks for this.
I can’t seem to make Finder search for a phrase. It returns hits as if it was an OR search. Help!?!
Hi Nancy, to search for an exact phrase in Finder, put it in quotes. I hope this helps!